
XMLHttpRequest atau XHR merupakan objek yang tersedia pada browser yang digunakan untuk membuat HTTP Requests menggunakan JavaScript. Karena namanya kita mungkin beranggapan bahwa XHR hanya mendukung format data XML, tetapi nyatanya saat ini XHR dapat digunakan oleh banyak format, bukan hanya XML.
Walaupun sekarang terdapat cara yang lebih modern yaitu menggunakan fetch, namun masih ada kok beberapa developer yang menggunakan XHR dalam melakukan HTTP Request. Alasannya karena alasan dukungan browser tua atau suatu fitur yang tidak bisa fetch lakukan seperti tracking upload progress.
Basic Usage
XMLHttpRequest dapat berjalan secara synchronous maupun asynchronous. Namun kebanyakan kasus HTTP Request sebaiknya asynchronous.
Contoh penggunaan dasar dari XMLHttpRequest adalah seperti ini:
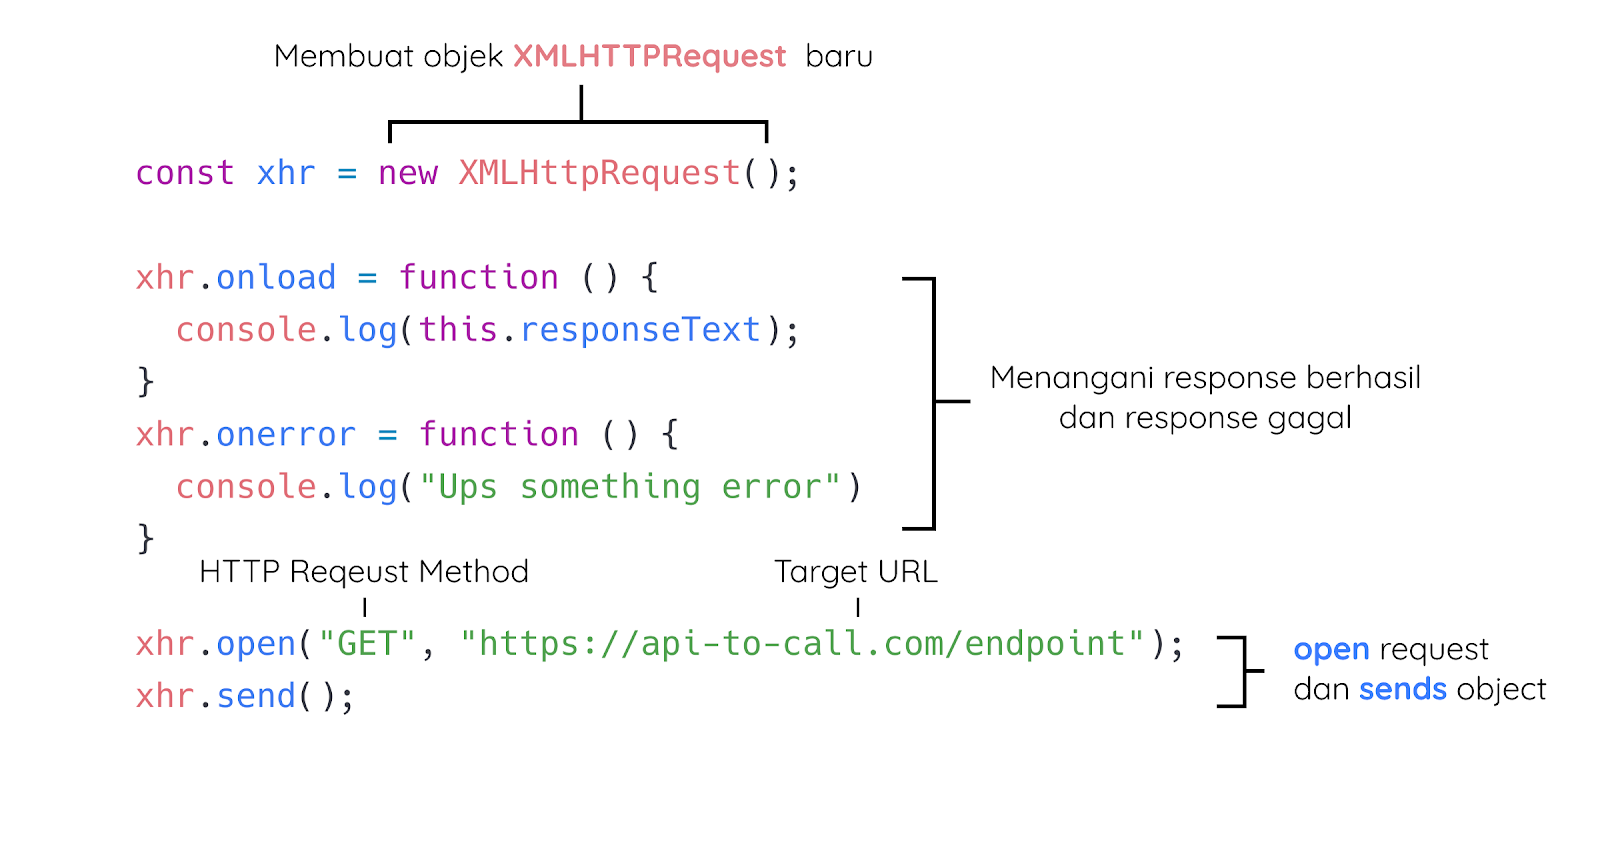
Langkah awal untuk menggunakan XMLHttpRequest adalah dengan membuat instance baru dari objek XMLHttpRequest seperti ini:
- const xhr = new XMLHttpRequest();
Lalu pada instance dari objek tersebut (xhr) kita tentukan callback function ketika request berhasil (onload) dan ketika request gagal (onerror).
- xhr.onload = function () {
- console.log(this.responseText);
- }
- xhr.onerror = function () {
- console.log("Ups something error")
- }
Di dalam callback function tersebut, nilai dari this merupakan XHR objek. Sehingga this.responseText akan memiliki nilai response (dalam bentuk text) dari server. Ingat karena pada callback function tersebut nilai this merupakan XHR objek, kita tidak dapat menggunakan gaya arrow function dalam menuliskan callback function-nya.
- xhr.onload = () => {
- // akan menyebabkan error, karena arrow function tidak memiliki this.
- console.log(this.responseText);
- }
Selanjutnya kita tentukan HTTP Method dan URL yang dituju dengan menggunakan method .open()
- xhr.open("GET", "https://api-to-call.com/endpoint");
Nah, langkah akhir adalah mengirimkan request yang sudah kita konfigurasi di atas menggunakan method .send().
- xhr.send();
Sehingga seluruh kode dalam penggunaan dasar dari XMLHttpRequest dengan contoh target url berikut https://web-server-book-dicoding.appspot.com/list adalah seperti ini:
- const xhr = new XMLHttpRequest();
- xhr.onload = function () {
- console.log(this.responseText)
- }
- xhr.onerror = function () {
- console.log("Ups something error")
- }
- xhr.open("GET", "https://web-server-book-dicoding.appspot.com/list");
- xhr.send();
Coba Anda copy dan paste kode di atas dan jalankan pada console devTools. Jika request berhasil, Anda akan mendapatkan data dalam bentuk JSON String. Data tersebut bisa Anda olah menjadi JavaScript objek dengan mengubahnya menggunakan method JSON.parse().
Anda juga bisa mencoba menjalankan potongan kode di atas pada repl.it melalui tautan berikut: https://repl.it/@dicodingacademy/163-06-AJAX-XHR-basic?lite=true
- JSON.parse(this.responseText)
Header and Body Request using XHR
Sebelumnya kita sudah belajar bagaimana cara menggunakan dasar XMLHttpRequest dalam membuat sebuah GET Request. Lalu bagaimana jika kita ingin menggunakan method POST dan menetapkan properti pada Header ? Lalu bagaimana cara mengirimkan data pada body HTTP Request? Yuk kita bahas permasalahan tersebut satu per satu.
Set Header Property
Dalam menggunakan Web API tidak selamanya kita hanya menggunakan GET request saja, terutama ketika request yang kita inginkan bertujuan mengubah atau menambahkan data. Web API biasanya meminta kita untuk melakukannya dengan method POST atau PUT. Tak jarang juga Web API meminta kita untuk menetapkan properti tertentu pada request header untuk menunjukkan credential yang kita miliki. Request tersebut sudah pernah kita coba ya menggunakan Postman. Tapi bagaimana ya caranya jika menggunakan XHR?
Untuk menetapkan properti pada request header, Anda dapat gunakan method setRequestHeader() pada instance XMLHttpRequest setelah menetapkan method .open(). Method tersebut menerima dua parameter. Parameter pertama merupakan nama properti dan parameter yang kedua adalah nilai yang akan ditetapkan pada properti tersebut. Sehingga untuk menetapkan properti Content-Type dengan nilai application/json pada request kita dapat melakukannya dengan cara:
- const xhr = new XMLHttpRequest();
- xhr.onload = function() {
- console.log(this.responseText);
- }
- xhr.onerror = function() {
- console.log("Ups something error");
- }
- xhr.open("POST", "https://web-server-book-dicoding.appspot.com/add");
- // menambahkan properti pada header request
- xhr.setRequestHeader("Content-Type", "application/json");
Kita dapat menetapkan properti pada request header sebanyak yang kita perlukan
- const xhr = new XMLHttpRequest();
- xhr.onload = function() {
- console.log(this.responseText);
- }
- xhr.onerror = function() {
- console.log("Ups something error");
- }
- xhr.open("POST", "https://web-server-book-dicoding.appspot.com/add");
- // menambahkan properti pada header request
- xhr.setRequestHeader("Content-Type", "application/json");
- xhr.setRequestHeader("X-Auth-Token", "12345")
Cukup mudah bukan?
Set Data to Body Request
Lalu untuk menetapkan data pada body request, lakukanlah pada method .send() dari instance XMLHttpRequest. Contohnya untuk mengirimkan data JSON String pada body request, begini caranya:
- const xhr = new XMLHttpRequest();
- xhr.onload = function() {
- console.log(this.responseText);
- }
- xhr.onerror = function() {
- console.log("Ups something error");
- }
- xhr.open("POST", "https://web-server-book-dicoding.appspot.com/add");
- // menambahkan properti pada header request
- xhr.setRequestHeader("Content-Type", "application/json");
- xhr.setRequestHeader("X-Auth-Token", "12345")
- const book = {
- id: 10,
- title: "Edensor",
- author: "Andrea Hirata"
- }
- xhr.send(JSON.stringify(book));
Sebenarnya tidak hanya JSON format yang dapat dikirimkan melalui body, pada situs MDN menyebutkan bahwa kita dapat mengirimkan dokumen yang sudah ter-serialized sebelum dikirim, atau data lain yang terdaftar pada Fetch spec seperti Blob, BufferSource, FormData, URLSeachParam, ReadableStream atau USVString object.
Contoh kode di atas dapat Anda temukan pada tautan berikut https://repl.it/@dicodingacademy/163-06-AJAX-XHR-Header-and-Body?lite=true. Anda bisa coba lakukan POST Request dengan menjalankan potongan kode tersebut
Hasil Akhir Cek :https://github.com/dicodingacademy/a163-bfwd-labs/tree/302-dicoding-books-xhr

Bookmark